Owen continues:
| Well, it sure was fun when the clavichord was going really, really fast, but eventually the issue of making the keyboard arises, and things get pretty slow. | |
 |
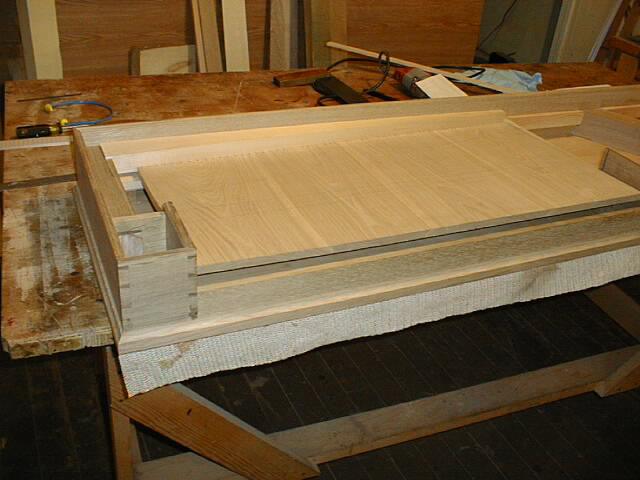
Here we are, after sawing the keys apart, cleaning up saw marks, working out the balance mortise, filing the guide pins and roughing them in. Slower'n hell. But getting there. When that's done, it's do the carvings in the lever part, rounding the boxwood part, using heat to even up any front alignment issues. Carving the scallop arcade-like things on the fronts. Seems like no end to it. By comparison, making harpsichord keyboards is pretty easy, fast, crude work. |
Balance pins are the metal pins the keys rock on on the balance
rail. These are soft iron plated with very smooth chromium or
something like that. Guide pins are the tongues of this or that at the
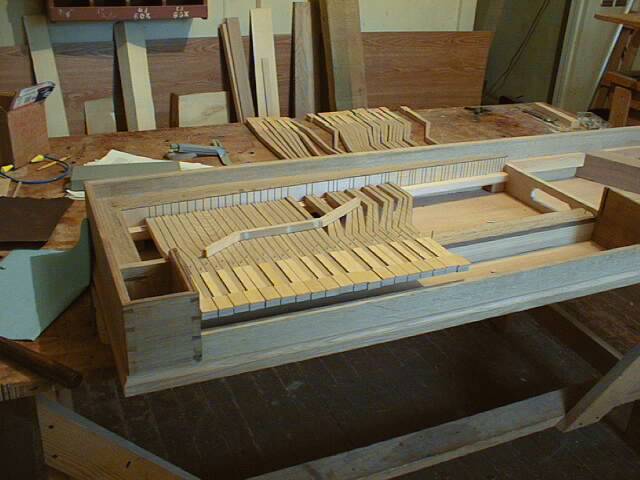 tail-ends of the keys that ride up and down in the rack slots. On
yours, and the last several instruments, they are of lignum vitae,
which wears like crazy and is self-lubricating, releasing, as it does,
its own oil. Used a lot for the bearings on the drive shafts of
ocean-going ships, and also for gears and shafts and bearings on water
wheels, where it stays oily while submerged. Backrail
felt is two layers, for quiet. It is from a very old blanket we bought
at an estate sale years ago. It is white, but at one end has big blue
lettering that says "U.S. Navy Medical Department." Nice touch. Very
quiet, thick, lovely wool. First layer is glued down to the back
rail. Second layer right now is just sitting there, but I'll probably
give it some restraint. Don't like to nail it, because it makes the
level uneven with little tufted humps. Two-sided tape works great,
holds well enough and doesn't change the function or levelness of the
backrail ... and it's reversable.
tail-ends of the keys that ride up and down in the rack slots. On
yours, and the last several instruments, they are of lignum vitae,
which wears like crazy and is self-lubricating, releasing, as it does,
its own oil. Used a lot for the bearings on the drive shafts of
ocean-going ships, and also for gears and shafts and bearings on water
wheels, where it stays oily while submerged. Backrail
felt is two layers, for quiet. It is from a very old blanket we bought
at an estate sale years ago. It is white, but at one end has big blue
lettering that says "U.S. Navy Medical Department." Nice touch. Very
quiet, thick, lovely wool. First layer is glued down to the back
rail. Second layer right now is just sitting there, but I'll probably
give it some restraint. Don't like to nail it, because it makes the
level uneven with little tufted humps. Two-sided tape works great,
holds well enough and doesn't change the function or levelness of the
backrail ... and it's reversable.
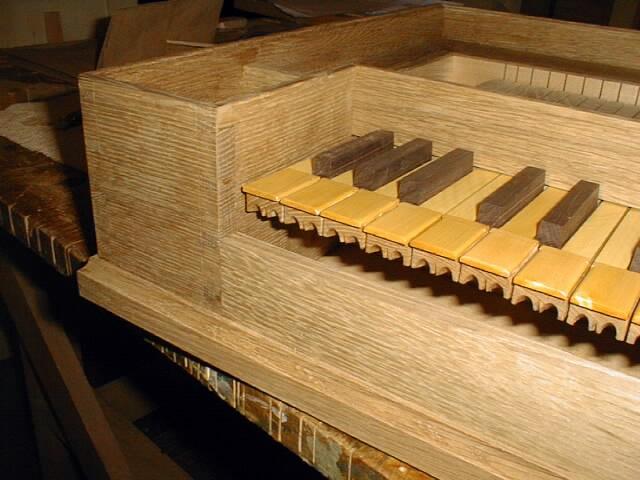 |
I made Brazilian (palisander? pau santo?) rosewood sharps this afternoon, which look really nice. Made 'em a tad smaller than the originals, and now they feel quite comfy. Glued 'em on this morning, put a couple of coats of finish on the naturals, and am halfway through a gentle sanding of the sharp blocks, 'breaking' the sharp edges is all. |
The thing is starting to look like a clavichord! And the keys are very silent.
I gave [my new] dust-collector a run for its money resawing some Englemann spruce for the soundboard. I bought it once out of the trunk of a tuna boat in a McDonald's parking lot on the freeway near Salem. The resawing usually leaves a snowstorm of dust like the asbestos in a WWII shipyard, and a pile about 6 inches deep on the floor, and the crud makes the saw cut poorly and makes it hard to see what you're doing. [But with the dust collector, there was] hardly a crumb anywhere to be seen.
The back of the board as it finally ended up. With each additional
rib, the thing got zippier, by the way. "Zippier" is sort of
hard to explain, but not even remotely subtle if you're there. When
the board is finished being planed, even with great wood glued with
hide glue and sized with same, and to nice thickness, etc., tapping
still elicits something relatively soggy and dull. Like wet cardboard
(or a finished sitka spruce harpsichord soundboard?!). At this point I
find myself tapping constantly and feeling a little bit anxious. Then
you glue on the bridge, and tapping makes louder and higher-pitched
sounds, but  the bridge itself still elicits pretty wooly
sounds. Then as each rib goes on (and as the residual moisture from
the glue works itself out over the course of several days) tapping
elicits brighter and louder noises, until the final thing which gives
the final boost occurs, which is restraining the edges when you
actually glue in the board. The good news is that the board always
sounds brighter and more responsive the day after it's glued in than
it did being held in the hands before installation. There is always a
pleasant surprise when you take off the go-bars. By zippier: the
closest analogy to what you hear is rubbing or tapping your finger
over the mesh or even directly over the diaphragm of an operating
microphone. Right now, if I tap or rub my finger on, say, the outer
case wall or molding of the clavichord, you hear absolutely
nothing. If I do the same thing, with no more energy, to the bridge,
you can hear it 20 or 30 feet away.
the bridge itself still elicits pretty wooly
sounds. Then as each rib goes on (and as the residual moisture from
the glue works itself out over the course of several days) tapping
elicits brighter and louder noises, until the final thing which gives
the final boost occurs, which is restraining the edges when you
actually glue in the board. The good news is that the board always
sounds brighter and more responsive the day after it's glued in than
it did being held in the hands before installation. There is always a
pleasant surprise when you take off the go-bars. By zippier: the
closest analogy to what you hear is rubbing or tapping your finger
over the mesh or even directly over the diaphragm of an operating
microphone. Right now, if I tap or rub my finger on, say, the outer
case wall or molding of the clavichord, you hear absolutely
nothing. If I do the same thing, with no more energy, to the bridge,
you can hear it 20 or 30 feet away.
 |
A little cut-out allows the treble rib to "cantilever" from the liner to prevent that awful sag one sometimes sees at the treble end of a clavichord soundboard, and to boost the frequency responses. |
Strips of cloth - muslin soaked in hide glue, as a matter of fact (known around here as "18th-century fiberglass") - help strengthen the fragile joint at the tips, where the ribs are tapered literally down to nothing. These points can, under stress, become fulcra of the ends of the ribs, so the cloth helps strengthen things there. The ones without cloth don't terminate in spots from which they're likely to lever themselves, so the cloth is less necessary. I could have used some, but the area was stiff enough already. Upholstery tacks are driven up into pre-drilled holes on the underside of the bridge. A venerable practice of many of the old guys. I once made the mistake of doing a "dry run" with the tacks on a clavichord bridge - without glue, of course - and had to use a pry-bar to get the damned thing off so I could glue it back down. Clavichord bridges are under horrific shearing strains, much worse than harpsichord bridges, and have been known to be torn loose, so we can use all the insurance we can get. The ribs are of soundboard wood. In this case I used true fir (spp. abies), even though the sounboard itself is Englemann spruce (spp. picea). Why? Just 'cause. I think that if the ribs are cut-out where they pass under the bridge you don't create nasty or dead spots as Hubbard claimed occured in cross-ribbed Italians. My Vaudry and my big Giusti [harpsichords] are both ribbed this way. Clavichord soundboards work better, I think, when they're relatively stiff and the strings don't have to drive big flabby, unsupported areas.
The little rib is analogous to the little one shown by Brauchli, but further from the tangent to the arc of the treble part of the bridge (in Brauchli's picture the little rib almost touches where the bridge is - though see below). My first several clavichords, using standard ribbing, eventually developed quite a trough between the treble hook of the bridge and the belly rail. The little rib, of course, fixes this, and provides a springy energy-storing thing to boost the treble into the bargain. I stole the idea shamelessly directly from the Edinburgh Hubert clavichord. What I stole in particular from Hubert was cutting out the liner and projecting the little rib back up into that area (without touching the liner) so it pivots from within the line of the liner, which is to say that it doesn't pivot at all. The ribbing patterns in Brauchli's article I will take as being on the originals, but the placement, I think, is probably conceptual and schematic, and doesn't show anything about actual placement. It can't, because the long diagonal rib he shows on Manuel's instrument would have to pierce right through the pinblock.
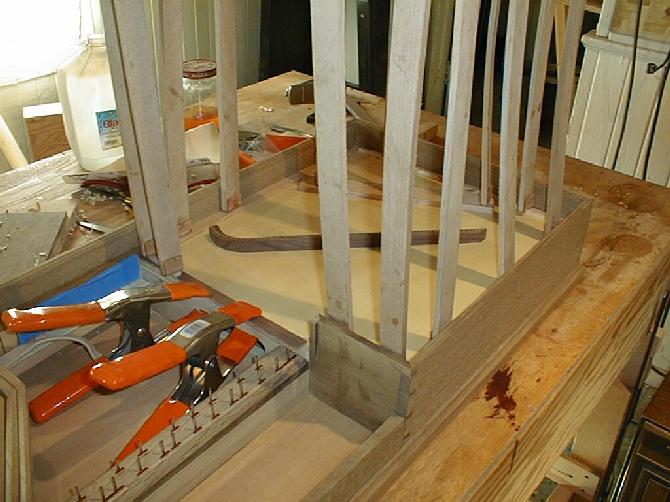 | 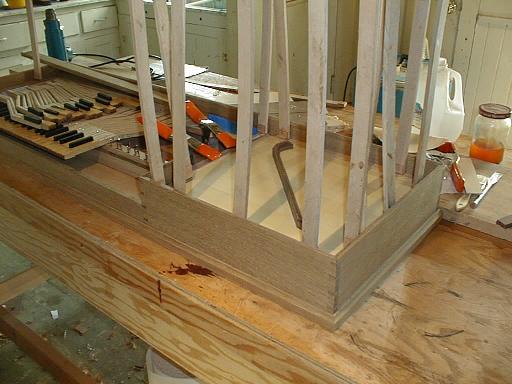 |
As I said, big day. A nice, warm sunny springtime day. It is claimed that such days are to be selected for gluing in soundboards because they make it easy to bias the humidity to the low-end for gluing-in. My suspicion is that they're suitable because gluing in a soundboard takes little actual time, and requires that one just go away and leave the damned thing alone for the better part of a day, and what better time to do that than a day suitable for hanging about outdoors?
| A picture of the shop on the morning of a day "suitable" for gluing in |
go on to Clavichord, pg. 3
go back to Clavichord, pg. 1
home